Mount Ord’s Pine-Covered Heights Picture of the Week - Rye, Arizona

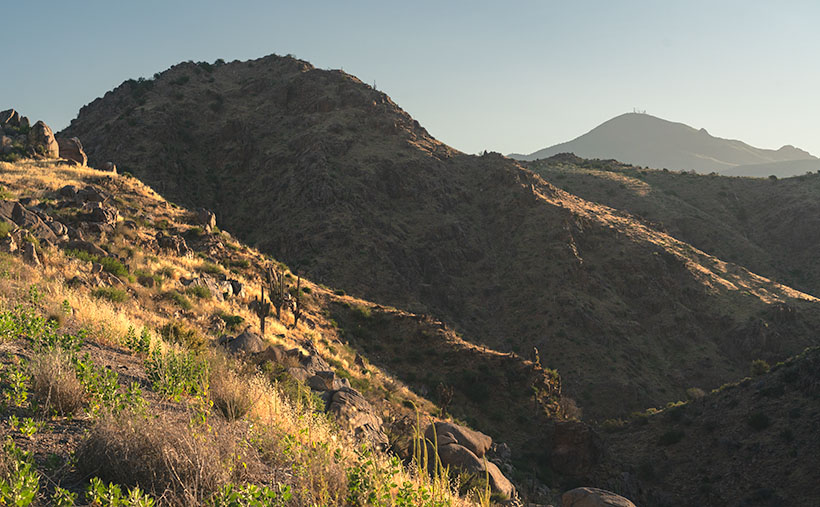
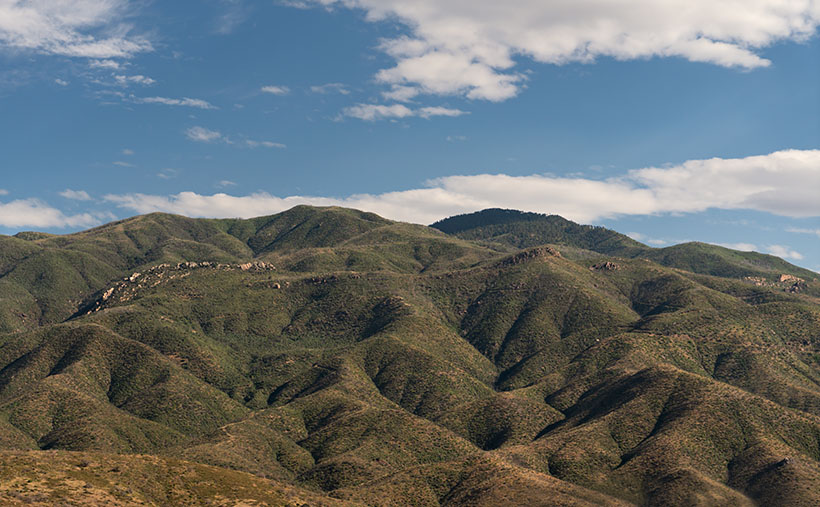
Mount Ord from the west side, showing its majestic peaks and pine-covered heights.
Mount Ord’s Pine-Covered Heights – Behold the awe-inspiring Mount Ord as it stands tall, adorned with lush pine-covered peaks. The afternoon sun casts its warm glow, revealing the rugged beauty of this majestic mountain.

Welcome back to the final episode of our Mazatzal Mountains tour. This week, our magic bus has made it over the last mountain pass, and we’ve stopped in Rye, the quaint community nestled at the bottom of the final grade leading to Payson. Here, the Beeline Highway exits the Mazatzals, bidding farewell to the majestic mountains that have enchanted us throughout our journey.

This week’s featured photograph, Mount Ord’s Pine-Covered Heights, captures the awe-inspiring grandeur of this majestic peak. Standing tall at 7,128 feet, its proud summit is crowned by a lush and verdant pine forest, gazing serenely at the world below. Mount Ord’s presence commands the landscape like a sentinel guarding the horizon. While it may not claim the title of the tallest peak in the Mazatzal Range (that honor goes to the 7,903-foot Mazatzal Mountain hidden behind the camera), being the highest point in Gila County is no small feat—perhaps deserving a participation trophy for its natural splendor.

Near the mountain top, the dark green foliage is an honest-to-goodness pine forest. It’s a sight to behold, and, unfortunately, a locked gate restricts access to this cool, refreshing forest on the unpaved service road leading to the summit. However, the image allows us to appreciate the beauty of this hidden gem from a distance.

Another fascinating feature in the photograph is a rugged and dramatic limestone layer emerging from the Earth’s embrace, seemingly carved by the hands of ancient giants. These yellowish rocks bear the story of a primordial ocean, etched into their very essence through eons of geological transformations. This layer of limestone formed millions of years ago in the sea and was later thrust into its current location during the continental crash that shaped the Rocky Mountains. This geological history makes the Mazatzals a part of the fender dent of that ancient collision.
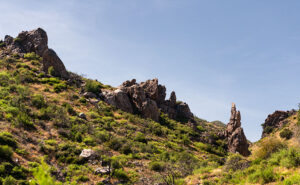
Close-up of an exposed limestone ridge, showcasing its jagged and fractured formations.
Jagged Elegance: The Thrust of Limestone – Intricate and sharp, the exposed limestone ridge reflects the Earth’s geologic history. Bathed in the warm glow of the backlit sun, this natural sculpture reveals the forces of nature at work.

The second image we’ve posted this week is a closer look at the limestone layer on the west side of the highway. One particular jagged piece looks like a shard of glass ready to be used in a bar fight. I’ve also captured a beautiful Claret Cactus in full bloom for those seeking variety beyond the rocks.
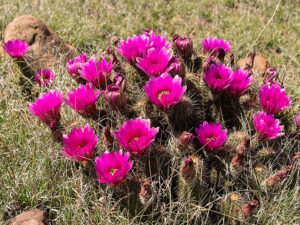
Close-up of a claret cactus with its vibrant, sunlit flowers in full bloom.
A Burst of Color: Vivid Claret Cactus Flowers – Midst the desert landscape, the claret cactus graces us with its vivid flowers, glowing like radiant gems in the sunlight.

We hope you’ve enjoyed our magic bus excursion through the Mazatzals and that you’ll appreciate the beauty of these mountains, even more the next time you drive up to Payson. As always, I invite you to view larger versions of “Mount Ord’s Pine-Covered Heights” on my website by following this link [Jim’s Website] or on Fine Art America using this link [FAA Page].

Next week, prepare to venture off the beaten path as we leave the comfort of our magic bus behind. In embracing cooler climes and untouched wilderness, we’ll embark on an invigorating hiking adventure to uncover the hidden gems of nature’s gallery.

Till next time,
jw

Techniques: Mastering Back Lighting

In photography, an outdated rule advises shooting your subject with the light behind and to the side of the camera. While this approach works well in about 80% of cases, there’s still the other 20%—those tricky backlit situations. Today, I’ll share how I tackle such challenging conditions during the shoot, and next week, we’ll delve into post-processing in PhotoShop to perfect these images.

A common concern in modern digital photography is preserving the highlighted details in a scene. Overexposing the highlights can lead to blown-out areas and loss of detail and information. Fortunately, many cameras, including mine, have a helpful tool to address this—the zebra stripes.

Zebra Stripes - The stripes are an exposure tool that warn you when the light is too bright for the camera sensor to capture.
Zebra Stripes – These are an exposure tool that warns you when the light is too bright for the camera sensor to capture.

Zebra stripes are diagonal lines that appear in your viewfinder, indicating areas where the light is too bright to be captured by the sensor. You can control when and where these stripes appear by setting the zebra threshold in your camera’s menu. For my workflow, I put the value to 100% to ensure a clear indication of potential overexposure.

Zebra stripes might appear in the sky or other bright areas when shooting in backlit conditions or during early morning or sunset. To tackle this, I slowly point my camera toward the bright area the stripes indicate until they disappear. This process helps me find the minimum exposure adjustment needed to avoid blowing out the highlights. Once the lines vanish, I half-press the shutter button to lock in the focus and exposure.

While holding the shutter button half-pressed, I recomposed the scene to my desired composition before fully pressing the shutter to take the shot. Finding the right half-press point takes practice, but with digital photography, you can afford to experiment and learn from your results.

Remember that when you review your shots taken using this method, the sky, and clouds might look perfect, but the ground could appear too dark with limited details. Don’t worry; next week, we’ll explore post-processing techniques in PhotoShop to enhance these images and achieve the perfect balance.

Until then, practice your zebra dance and keep saving those highlights!

Mountains, Canyons, and Sycamore Creek: Swimming in the Beauty of Arizona’s Wilderness Picture of the Week - Sunflower, Arizona

Scenic view of the Mazatzal Mountains and Sycamore Creek Canyon in Arizona.
Mountains, Canyons, and Sycamore Creek: Swimming in the Beauty of Arizona’s Wilderness – Immerse yourself in the breathtaking beauty of the Mazatzal Mountains and the picturesque Sycamore Creek Canyon.

Welcome back to our journey through the picturesque Mazatzal Mountains, where nature’s timeless artistry unfolds beneath our feet. In our continued exploration, we delve into the geological wonders that have shaped this majestic range, revealing the secrets of its ancient past. Join us as we uncover the captivating stories etched in rock and discover the remarkable forces shaping this rugged landscape.

With this terrible heat, wouldn’t it be nice to walk into Baskin Robbins and order a delicious burgundy-cherry cone? Although the ice cream cools your tongue, the heat melts it so fast you have to lap it up to keep it from running down your arm, and you get brain freeze. Wait, I can make it better. What if you returned inside with the empty cone and asked for a free refill? That’ll never happen, but that’s sort of the geological story of the Mazatzal Mountains.

The Mazatzal Mountains, with their rugged beauty, hold within their rocky layers a fascinating geological history that spans millions of years. Formed through intense tectonic activity and volcanic eruptions, these ancient mountains have witnessed the collision of ancient island arcs with the North American continent, creating a massive mountain range. Over time, erosion and subsequent uplift events shaped the Mazatzals into the awe-inspiring landscape we see today. Composed primarily of Precambrian and Paleozoic rock formations, these mountains showcase the power of tectonic forces, as evidenced by their uplifted and tilted nature.

On our imaginary drive through the Mazatzal Range, we reached Rincon Pass near Crabtree Butte. We stopped at this spot to shoot this week’s featured image. East of the Beeline Highway is a 400′ deep canyon carved by Sycamore Creek on its journey to the Verde River at Fort McDowell.

As we stand at the top, soaking in the awe-inspiring beauty of the canyon, the west-facing slopes still lie in shadow while the rising sun casts a warm and enchanting glow on our side. Like interlocking fingers, the ridgelines gracefully descend into the canyon, creating a mesmerizing pattern of diagonal lines. Through the distant haze, our eyes are drawn to Mount Ord, adorned with a majestic crown of communication towers. Rising to an impressive height of 7,128 feet, it proudly claims the title of the highest point in Gila County. Amidst this picturesque scenery, we can’t help but feel a sense of hidden treasure, including the irresistible allure of a rumored swimming hole waiting to be rediscovered.

My previous dentist told me that there was a deep swimming hole at this canyon’s bottom. It held cool water throughout the year, where you could soak in complete isolation. He was an avid backpacker, so we took his word for it. I can’t vouch for his story because the creek isn’t visible from the highway. The only way to verify his story was by hiking down to it. As I’ve whined before, I’d need a personal riding drone—but I’ve grown older since then, and today, I’m looking for a flying walker.

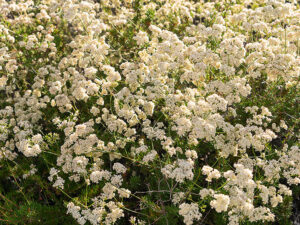
Close-up of a desert bush adorned with delicate white flowers in Arizona.
Weeds or Wildflowers? – Witness the delicate beauty of native Arizona flowers as a desert bush showcases its intricate white floral clusters.

As we conclude our stop at the top of Rincon Pass, we find ourselves halfway to Payson, but our adventure through the breathtaking Mazatzals is far from over. The beauty and allure of these mountains extend beyond the Beeline Highway, waiting to be discovered on either side. If you’d like to experience a larger version of Mountains, Canyons, and Sycamore Creek, click on this link (Web Version) to visit the web page or this link (FAA Version) to view my upload on Fine Art America. Join us again next week as we take a refreshing detour along the enchanting Sycamore Creek.

Till next time
Jw

Technique: Setting an image’s black point and white point

Ansel Adams was the master photographer that influenced my work the most. Setting aside his spectacular subject matter and sense of composition, I’m awed by the full range of tones he got in his prints. If you’ve never seen one in person, you’re missing out—the reproductions in magazines and books are different. It’s the equivalent of listening to your favorite music on a cheap transistor radio instead of a live performance. The tune is recognizable, but the song’s not right without the deep bass and sparkling trebles.

Throughout his long career, Ansel worked with a technique called the Zone System. In those days, black and white photo paper could only reproduce ten distinctive shades of gray from the blackest black (zone 0) to paper white (zone 10). His experience meant that he could look at a scene and visualize how it should look on paper. He got his desired results using different exposures, developers, papers, and toning. I tried to learn the Zone System, but I’ll never be that meticulous.

Fortunately for those like me, digital photography has made it easier to master getting full-range photographs, and the PhotoShop tool I use is Levels (all photo editing software have a variation of this tool). After cropping and color balance, my workflow’s third step is setting the black and white points. So I can go back and tweak it later; I always work with adjustment layers.

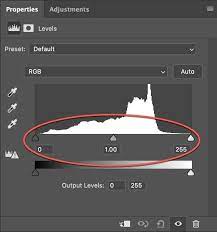
A screen shot of PhotoShop's Levels Tool.
PhotoShop’s Levels Tool – This handy tool makes setting the black and white points in photographs easy.

You can make several modifications with the Levels Tool, but I’m a simpleton, so I use the default settings and only make these small changes. Within the tool, a histogram (graph) sits on a baseline and three sliding arrows beneath it. Under the arrows are three boxes with value numbers tied to the sliders. If you move the arrow, the numbers change; if you change the number, the slider moves.

To set the black point, I move the left arrow to the right until it aligns with the graph’s left value. The right arrow will affect the white point, so move it to the left until it’s under the graph’s right end. If the histogram goes from wall to wall, the points are already good, don’t mess with them. I’ve done this process so often that I can usually type in the needed values. The final setting I make with the Levels Tool is setting the midpoint. Its default setting is 1. If my image is for the internet, I set the midpoint (gamma among the in-crowd) to .90 by shifting the center arrow to the right. If I’m making a paper print, I need to lighten it, so I move the center arrow left to set the value to 1.10 (the difference is that the first is a translucent light source, and the second is a reflective light source). After you’ve made your adjustments, you can click on the eyeball icon to turn the layer on and off to see the effect. Your picture will look livelier with rich blacks and sparkly whites.

Have I thoroughly confused you? Well, good. To help you, I found a YouTube tutorial explaining the levels tool (YouTube Levels Tutorial). You can ignore all the other gibberish in this video, but pay attention to his explanation of Adjustments vs. Adjustment Layers and what happens when he moves the sliders. After you watch the clip, you can return here and reread this section—it will make much more sense then.

Four Peaks: The Crown Jewel of the Mazatzal Mountains Picture of the Week - Fountain Hills, Arizona

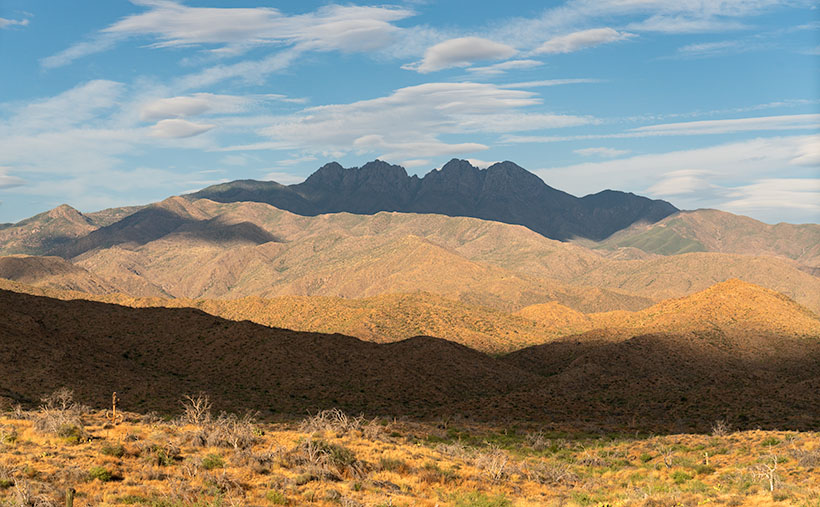
Four Peaks in the Mazatzal Mountains: Majestic mountain range against a backdrop of lenticular clouds and blue sky.
Four Peaks: The Crown Jewel of the Mazatzal Mountains – A captivating view of Four Peaks and the dramatic play of lenticular clouds in the Arizona sky.

Yea! We’ve made it over the hump. Now we start whittling away the second half of 2023. But first, we must suffer through the insufferable—our monsoon season. As we enter the scorching summer months in Arizona, fleeing from the heat becomes a top priority for Phoenicians. We seek refuge in the pleasant mountain landscapes outside the city to beat the relentless triple-digit temperatures and humidity. But hey! I’m here to help, so July’s photo project involves one of the escape routes Phoenicians by the thousands use each weekend—the Beeline Highway.

It’s been at least a decade since I last drove Arizona State Route 87, but last month, my friend—and regular contributor—Fred asked me to help him fetch some trailer equipment in Heber—a small community on the Mogollon Rim. As he drove through the rugged mountains to Payson, I rode shotgun and thought, ‘I forgot how spectacular this scenery is. I need to come back with my camera.’ That’s when I decided to do July’s Mazatzal Mountains project and use the Beeline Highway for our trail. It sure beats hiking.

The name—Mazatzal—is a directive of a tribal word the Spanish picked up from the native Indians, Mazatzalli—meaning ankle bone. The Yavapai thought these mountains resembled an ankle when viewed from certain angles. Situated northeast of Phoenix, the Mazatzal Mountains stand as a rugged and formidable barrier, marking the gateway to the Rim Country. These majestic peaks serve as a scenic backdrop for Phoenicians as they embark on their journey to the Mogollon Rim and its surrounding areas. While the Mazatzals offer breathtaking vistas and a sense of natural grandeur, access to their remote backcountry is primarily reserved for avid hikers, horseback riders, and outdoor enthusiasts seeking a more adventurous experience. It’s important to note that due to the rugged nature of the terrain and limited facilities, the Mazatzals may present challenges in terms of accessibility, especially for individuals with mobility restrictions.

As we travel along the Beeline Highway, we traverse a physical distance and ascend through a tapestry of changing climates and vegetation. From the arid lowlands near Phoenix, we gradually ascend into cooler uplands adorned with diverse flora. We witness transition from cacti-dotted desert landscapes to lush pine forests and high-altitude meadows. This elevation-driven change in vegetation is a constant reminder of the varied ecosystems thriving within the Mazatzal Mountains.

This brings us to this week’s image—Four Peaks: the Crown Jewel of the Mazatzal Mountains. This image is my latest attempt to capture the highest point in Maricopa County. Well, they’re the highest four points in the county. From left to right, they’re named: Brown’s Peak (7657′), Brother Peak (7642′), Sister Peak (7572′), and Amethyst Peak (7524′). On the afternoon that Queen Anne and I stopped to take this image, it was windy, and the sky was filled with lenticular cumulus clouds (cirrocumulus clouds that look like lenses). As they crossed the sky, they cast shadows on the mountain, adding depth and drama to the composition. Without the shadows, the mountain would appear flat and featureless.

Thank you for joining us on this virtual journey through the Mazatzal Mountains. We invite you to share your experiences and memories of these stunning landscapes. Feel free to connect with us and the community as we continue exploring this magnificent region’s natural wonders. Stay tuned for our next installment, where we delve deeper into the heart of the Mazatzals.

Sugarloaf and Sycamore Creek: Impressive rock formation and desert landscape in Arizona's back-country.
Sugarloaf: A Gateway to the Majestic Mazatzal Mountains – When the Beeline Highway passes between Four Peaks and this landmark, you know you’re finally out of town and into the Mazatzals.

If you’d like to see a larger version of Four Peaks, you can do that in several ways. The first is to visit its Webpage using this link (https://www.jimwitkowski.com/newWork/fourPeaks.html). Miss Deb reported last week that the second method works only if you use a desktop computer. Follow this link (https://fineartamerica.com/featured/four-peaks-jim-witkowski.html) to my posting on Fine Art America. Please hover your mouse cursor over the image until a green square appears (they’re magically delicious). Select the area you want to inspect, and then click. A one-to-one preview window of that section will open on the screen.

Till Next Time
jw

Techniques: Embracing the Elements and Finding Drama in Nature’s Surprises

Photography is a dance with elements; sometimes, the most captivating images come from natural surprises. As photographers, we can embrace these elements and find beauty and drama in their presence. The photo of Four Peaks with its lenticular cumulus clouds and their resulting shadows is a prime example of how nature can add a touch of magic to our compositions. When faced with unique cloud formations, we may be tempted to wait for them to clear, fearing they will obscure the peaks. However, there is value in embracing the unexpected and capturing the scene as it unfolds. By incorporating the lenticular cloud shadows, the image takes on a new level of depth and intrigue. The shadows play across the rugged mountain terrain, accentuating its contours and adding drama to the composition.

When you find yourself amid nature’s surprises—a sudden storm, an unexpected play of light, or unusual cloud formations—embrace them. Explore their potential to add depth, drama, and a touch of magic to your photographs. Remember, breaking the rules or deviating from your initial plans can lead to some of your most captivating and memorable images.

Valencia Peak Vista: Capturing the Essence of Montaña de Oro Picture of the Week - Morro Bay, California

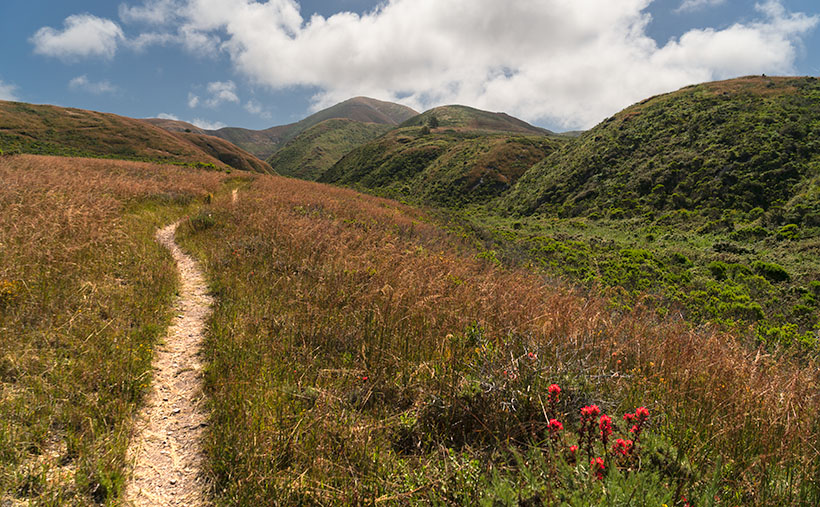
Landscape view of Bluff trail winding through grassy field with majestic mountains in the background at Montaña de Oro State Park in California
Valencia Peak Vista: Capturing the Essence of Montaña de Oro – Immerse yourself in the breathtaking beauty of Montaña de Oro State Park as you follow the beautiful Bluff trail, surrounded by rolling grassy fields and towering mountains. Discover this hidden gem’s serenity and natural wonders on California’s central coast.

Welcome back to our San Luis Obispo County project. As I tried to explain last week, it’s one of our favorite spots on the planet. Usually, the purpose of our trips involves wine tasting, so we spend most of our time traveling the roads that run past the vineyards and traverse the coastal mountains—the Santa Lucia Range. With an extra day set aside for photography, Queen Anne and I made a pact to explore places in San Luis Obispo County that were new to us.

On the morning of our shoot—after I dragged her majesty out of bed while we ate breakfast—I showed her a road I found on our California Gazetteer. It began in Morro Bay and made its way along the coast on the Montaña de Oro headlands to Pismo Beach. I told her my plans to drive down to the resort town and then return via the 101 Freeway. She thought that was a great idea as long as there was a candlelight dinner and a glass of Chardonnay at the road’s end. However, halfway through the drive, we found a locked gate preventing us from going further. It turned out that someone built the Diablo Canyon Nuclear Generating Station in our way and closed the road—how inconsiderate.

Our day wasn’t a total loss because, between Morro Bay and the gate, we drove through three nature preserves: Morro Bay Estuary, El Morro Elfin Forest, and Montana de Oro State Park. Since we had to double back, I’d have to settle with subjects along our route—oh, pity the poor photographer because each place is worthy of an afternoon—if not longer.

Morro Bay Estuary: A coastal wetland teeming with diverse wildlife and stunning vistas. A network of trails to explore that wind through the estuary offers opportunities to spot various bird species, including majestic herons and graceful egrets. If you remember to bring your mukluks, you may even try digging for clams or annoying the critters you’ll find in the tidal pools.

El Morro Elfin Forest: Unique and magical woodland. Marvel at the twisted, dwarfed trees that named the forest, creating an ethereal atmosphere. Stroll along the well-maintained trails, enjoying the tranquil ambiance and the delicate balance between the forest and the surrounding coastal dunes. Keep your eyes peeled for rare plant species and enjoy the peaceful serenity of this hidden gem.

Montana de Oro State Park: A coastal paradise of rugged cliffs, golden beaches, and sweeping vistas. Hike along the stunning bluffs overlooking the Pacific Ocean, witnessing the power of crashing waves and the dramatic coastal scenery. Explore the tide pools, where you can encounter a fascinating array of marine life, and venture further into the park to discover hidden coves and secret beaches.

I took this week’s image at the Bluff trailhead in the State Park. From the parking area, we had a choice of taking the trail down to the ocean or venturing across the street to embark on the course that led us into the majestic mountains. As we made our way along the path, the peaks rising to Valencia Peak stood before us, their commanding presence adding a sense of grandeur to the surrounding landscape. Amidst this natural beauty, my attention was drawn to the display of a bright orange Indian paintbrush. I knew that capturing this scene would encapsulate the essence of Montaña de Oro’s breathtaking vistas.

We invite you to visit the web version of this image, where you can view a larger version of Valencia Peak Vista: Capturing the Essence of Montaña de Oro. Immerse yourself in the stunning scenery, the rich colors, and the sense of serenity captured in this image. It’s a visual testament to the beauty in San Luis Obispo County.

Mark your calendars, and come back next week for another captivating tale and image. Until then, keep exploring, keep capturing moments, and remember that every step you take can lead to new and remarkable discoveries.

Till next time
jw

Techniques: Utilizing Leading Lines in Your Photographs

Leading lines such as the trail, the line of peaks, and the swale in this week’s image are powerful compositional elements that add depth and guide the viewer’s eye through the image. They create a visual pathway, drawing attention and creating a sense of movement. Whether straight, diagonal, or curved lines enhance the overall composition and introduce a three-dimensional quality.

These lines don’t have to be literal; the arrangement of objects or elements can imply them. By utilizing leading lines effectively, you can elevate your images’ impact and storytelling potential, inviting viewers to explore and discover hidden depths within the frame.

You can transform a simple scene into a captivating visual story by incorporating leading lines into your photography. Experiment with different types of lines and their placement to create a dynamic narrative within your image. Consider how leading lines interact with other elements and the mood they evoke.

Arlington’s Abandoned Feed Mill: Fading Memories of Cattle Country Picture of the Week - Arlington, Arizona

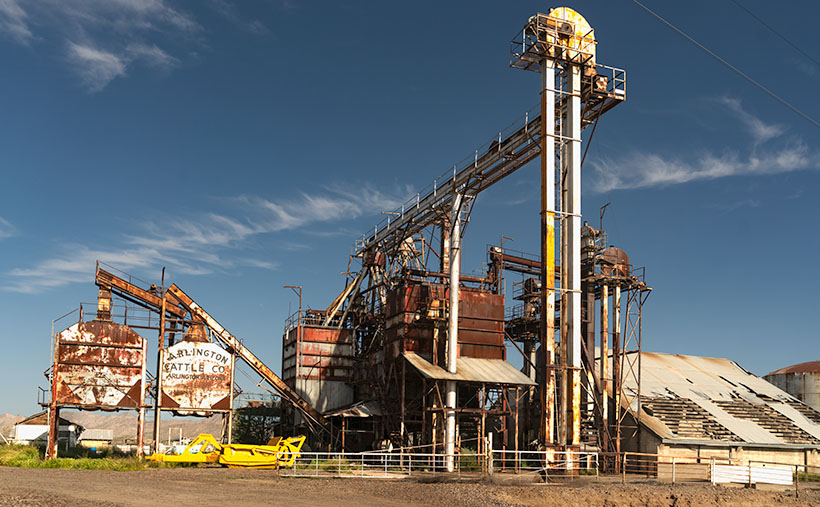
Abandoned farm equipment at Arlington Cattle Company
Arlington’s Abandoned Feed Mill – The abandoned grain hoppers and silos of the Arlington Cattle Company were left to rust in the Arizona desert.

Last week, I wrote about the exceptional rainfall we had in Arizona and how the wildflowers love it. Well, the same wet winter that showered our land with nature’s colorful confetti also brought heavy mountain snowfall. Since the predicted snowmelt and runoff would overflow our reservoirs, the Salt River Project began releasing water into the river. It’s been quite a while since we have had water in our ordinarily dry riverbeds. While some may scoff at the idea of water in Arizona’s riverbeds, I was thrilled that I might get the chance to shoot some whitewater rapids in the desert.

I convinced Queen Anne to go-for-a-ride(?) a couple of weeks ago. We drove down the west valley to the Gillespie Bridge, excited at the prospect of capturing the raging torrents of water. However, upon arrival, we were met with disappointment. The river was spent and lethargic when the artificial flood passed through Phoenix. The snowmelt’s aftermath left us with sluggish, murky water oozing through the tamarisk. It looked more like effluent than a river. Feeling disheartened, we started to return home when I noticed the stunning light falling on the machinery at the Arlington Cattle Company. When I stopped the car and grabbed my camera, Anne responded, “Hurry up! I’m Starving.”

The Gila River begins its journey in New Mexico’s Gila Mountains. It collects water from its tributaries, including the Salt River, the Verde River, the Santa Cruz River, the New River, the Agua Fria River, and the Hassayampa River. The Gila River embarks on an audacious westward journey, carving its path through untamed landscapes. Just after the confluence of the Gila and Hassayampa rivers, the Gila turns south for thirty miles towards Gila Bend. As the river flows past the Buckeye Hills, it enters a natural pinch point several miles down old US 80. It passes between a formidable silhouette of a volcanic sentinel and the edge of Gillespie Shield Volcano. The black rock lava flow rises two or three stories above the road and river and is known for its impressive pictographs, visible along the cliff of lava rock when examined closely. At this pinch point, pioneers attempted to build three versions of the dam. After they all failed, the highway department erected an all-season bridge to cross the river. Local farmers plant the dam’s old flood plains in summer with deep green cotton, making the little valley a desert oasis.

I’ve been to the Arlington Cattle Company before, so this wasn’t my first time photographing this abandoned equipment. The last time I photographed there was over a decade ago; the massive boom that sent grain over the road to the feed lots there had collapsed into the canal flowing along the roadside. Someone has cleaned that mess up since then. As I stood and framed the shot, I could hear the ghostly sounds of machinery banging, gears meshing, and belts squealing in protest. The equipment stands as a testament to the relentless march of time, bearing the scars of decades past, with the weathered vestiges of industry adorned in hues of faded silver and rust contrasting against the intense blue sky. However, what catches my eye in this photo is the tall silver elevator, which towers above all else, and with the sun’s reflection, it appears as a beacon against the bright blue sky. The wispy white clouds in the background are a bonus and provide a nice contrast to the earthy tones of the equipment.

The Arlington Cattle Company was established in the early 1900s by a group of investors led by William W. Clemens, who also served as the company’s president. The company purchased approximately 55,000 acres of land in the Arlington Valley and constructed a state-of-the-art cattle feeding facility. The company aimed to fatten cattle for the market using a combination of locally grown grains and hay from nearby farms.

The facility stood as a cathedral of innovation, a testament to the audacity of human endeavor, featuring a grain elevator that could lift and store thousands of bushels of grain at a time. The elevator was powered by an extensive motor and conveyor system that could move the grain from the elevator to the various silos and feedlots throughout the property. The company also built a vast network of canals and irrigation ditches to ensure a reliable water supply for the crops (and cattle).

Despite the initial success of the operation, the Arlington Cattle Company struggled to turn a profit. The company faced several challenges, including drought, floods, and fluctuations in the price of beef. In addition, the company’s location in a remote part of the state made transportation difficult and expensive. As a result, the company was forced to declare bankruptcy in the early 1920s. After the default, the land and equipment were sold to various buyers. Today, the rusting equipment seen along the roadside in the Arlington Valley are the only remnants of the Arlington Cattle Company.

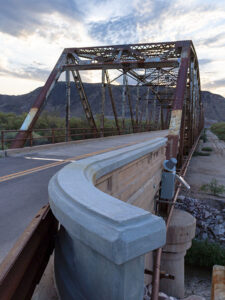
Rustic Gillespie Bridge spanning the Gila River with a mountain in the background
Old US 80 Bridge at Gila River – The historic Gillespie Bridge at Gila River, part of Old US 80, features a rusted iron truss structure and spans over the water with a volcanic rock mountain in the background.

I hope you enjoyed this week’s photo and reading about the Arlington Cattle Company and the old farm equipment that still represents Arizona’s ranching history. Don’t forget to check out the larger version of Arlington’s Abandoned Feed Mill Cattle on our website by clicking here. Join us next week for more fascinating stories and photos of farming equipment, from the old to the new. And who knows, maybe we’ll even find something borrowed and blue. Thanks for reading!

Till next time
jw

San Jacinto Field Temecula, California

San Jacinto Field - The snow covered San Jacinto Peak dominates the skyline near Temecula, California.
San Jacinto Field – The snow-covered San Jacinto Peak dominates the skyline near Temecula, California.

Long before I moved to Arizona—before my time in the Army—I used to enter rallies driving my 64 Ford Falcon. For my non-gearhead readers, a car rally is a competition where the hosting club plans a pleasant drive through the countryside. A driver’s job is to follow directions at a given speed and arrive at checkpoints on time. At the same time, the event chairperson purposefully writes the instructions as vague as possible for back roads that are impossible to drive at the speed they’re talking about. Each team is scored by how many seconds off you arrive at checkpoints behind schedule—if you can even stay on course.

I mention this because, in last week’s comments, our friend Gary brought up an “uphill-in-both-directions-in-the-snow” moment—in other words, his later recollections of Temecula Valley. It reminded me of the only previous time I visited the farms and fields of Riverside County was during one of these rallies.

In the October between high school graduation and joining the Army, we’d pilgrimage to the legendary Riverside International Raceway to attend the annual Can-Am race sponsored by the Los Angeles Times. In those days, Can-Am cars were the cutting edge of racing technology, having big brutish American engines shoehorned into tiny European chassis. I was an apostle. I didn’t know it then, but in 1969 Uncle Sam was reaching for my shirt collar, so my teenage days were numbered.

As that summer ended, I was already planning a long October weekend at the racetrack. The So-Cal Sports Car Club was staging a pre-race time-distance rally in Riverside, culminating with two laps around the track. I don’t remember why my usual navigator wasn’t available, but I recruited the older brother of one of my friends because he wanted to see the race and said he could read directions.

For brevity’s sake, all I will say about that event was that it started in the Shakey’s Pizza parking lot across the street from Riverside’s stunning Mission Inn on a cool, damp, and foggy Sunday morning. The course layout took us past Hemet, Moreno Valley, and Perris towns. We couldn’t see more than a thousand feet of road through the grey murk. We missed the mountains, fields, and trees dotting the countryside, but we did pass cherry stands that I was sure I’d return to someday. My navigator and I got hopelessly lost and behind schedule, so we threw in the towel and drove to the last known checkpoint with our tails between our legs. We rejoined the group at an infield staging area and thought, “At least we’d get a couple of timed laps around the track.”

You already know what’s next, don’t you? The laps weren’t time trials as I had imagined. It was a painful parade of rally drivers behind a slow pace car at 25 mph. Everyone was holding back to get a run at the turns by the second lap. The pack of cars looked like a hobbled caterpillar trying to make its way along a cherry tree branch. At the time, it was genuinely humiliating. I wanted to show Jim, Dan, Mark, Bruce, and Roger how good I was. Now, it’s amusing.

As Gary mentioned last week, that part of California is different now. The two-lane back roads we sped down are now eight-lane freeways with crowded off-ramps. The rural fruit stands have been replaced with Costco, CVS, LA Fitness, and car dealerships. The pristine mountain ridges are lined with rows of McMansions that look like pop-up targets at a rifle range. With clusters of boxy tract homes, Temecula Valley has become another typical So-Cal suburb.

Queen Anne and I spent time driving between housing developments during our January visit and saw a glimpse of the past. In this week’s photo, you can see the open spaces we found by Lake Skinner. In the shot that I call San Jacinto Field, the foreground is dominated by a field left fallow this season. In the near background, you see low-elevation mountains—Bachelor Mountain (2470) on the left and Black Mountain (3051) on the right. Covered in the snow in the far distance is San Jacinto Peak (10,834), which is over 50 miles as the crow flies. It’s much further if you walk. This photo was taken a month before California recently got slammed with two heavy snowfalls. I’m sure the top is even brighter white at this writing.

Wine Glasses - A sample of red and white wines while enjoying lunch at one of Temecula's Vineyards.
Wine Glasses – A sample of red and white wines while enjoying lunch at one of Temecula’s Vineyards.

Like always, you can see a larger version of San Jacinto Field on its web page by clicking here. Be sure to return next week when we drive up the wine-country valleys and visit some vineyards.

Till next time
jw

Dragon Backs Picture of the Week

Dragon Backs - A pair of peaks in the Dome Rock Mountains that look like spiny back dragons.
Dragon Backs – A pair of peaks in the Dome Rock Mountains that look like spiny back dragons.

The drive between Quartzsite and Yuma on Highway US 95 has two parts. Driving in either direction, it’s thirty miles of gentle uphill grade and then downhill for the other thirty. The mid-point is at Stone Cabin (now an empty building shell), where the Border Patrol checkpoint is.

From Quartzsite, the road is dead straight, and your line of sight is limited only by the whoop-de-woos (wash dips) and the earth’s curvature. The 800-foot climb is barely noticeable, and the road is flanked on the east by the KofA Mountains (named for the King of Arizona mine), and to the west are the Dome Rock Mountains (the dome you see west of downtown Quartzsite).

The south half of the trip has a steeper grade—most of which is in the first mile, where the highway drops off a hill. The scenery changes too. There’s a different mountain range far off to the east—the Castle Dome Mountains, but you’re surrounded by the Yuma Proving Grounds, where the military plays with its new toys. Instead of a pleasant drive through the wilderness, you begin searching for things like the down-looking radar dirigible, a Bradley tank using your car for target practice, or the C-130 that just took off and climbed to 10,000 feet before troopers shove something big out of the back—I sure hope that chute opens.

Whenever Queen Anne and I travel this road, I look for these landmarks to help pass the time. I’d rather have a stimulating conversation about physics with her, but she usually has her head pressed against the headrest, her eyes closed, and her mouth open. She stays that way until one of her snorts wakes her.

On the drive home, one of the landmarks I look for is a pair of unnamed mountains in the Dome Rock Range. When I pass them, we’re nearing the Quartzsite city limits. The twin peaks look like a pair of dragons sunning themselves on a rock. I’ve often thought I’d like to get their portrait, but no matter how much map scouring I do, I’m unable to find a way to get closer—short of hiking two and a half miles across the open Mohave Desert.

The spiny back of the dragons climbs from the desert to their west-facing heads—where they watch the Colorado River flow south. As with last week’s shot, we always drive by them right after lunch. That’s the absolute worst light in the desert. I keep swearing on a stack of Ansel Adams books that I will shoot them when the light is correct, but it’s yet to happen.

On our last drug run—when last week’s photo was taken—clouds were gathering over the Dome Rock Range, so instead of a uniform blue sky, there was texture over the mountains. After I took the KofA Thunderhead shot, I walked across the highway and pointed my camera at the dragons. This time I twisted the zoom to telephoto and framed the monsoon clouds. The result is this week’s featured image, which I call Dragon Backs.

You can see a larger version of Dragon Backs on its Webpage by clicking here. Next week, I have pictures to show from a different place for show-and-tell. I hope you can take a break from your Christmas shopping and take a look. We’ll see you then.

Till next time
jw

BTW:

Flagstaff Book - A collection of photographs and musings from our summer trip to Flagstaff.
Flagstaff Book – A collection of photographs and musings from our summer trip to Flagstaff.

Oops, I Did It Again (Britney Spears song written by Richard Thompson). I published another book. This one covers all of the places we visited in and around Flagstaff. As usual, it’s available in two versions. You can see and buy the hardback on Blurb.com—which you won’t do because it’s too expensive—and the free PDF version you can download, view, and print from your computer. There are additional photos in each of the four chapters, so I’m hoping you take a look. You can get to its Web Page by clicking here.