As we approach mid January, I’ve already made progress on one of my New Year’s resolutions which was to get my photo work on display in a gallery or show at least four times this year. Last Tuesday, Anne and I took a framed print down to the Wickenburg Art Center (WAC) for display and sale in their gallery. I posted an article last month about having my work juried so that I could take part in local events. A side benefit of the jury process is that I can hang some work in their gallery.
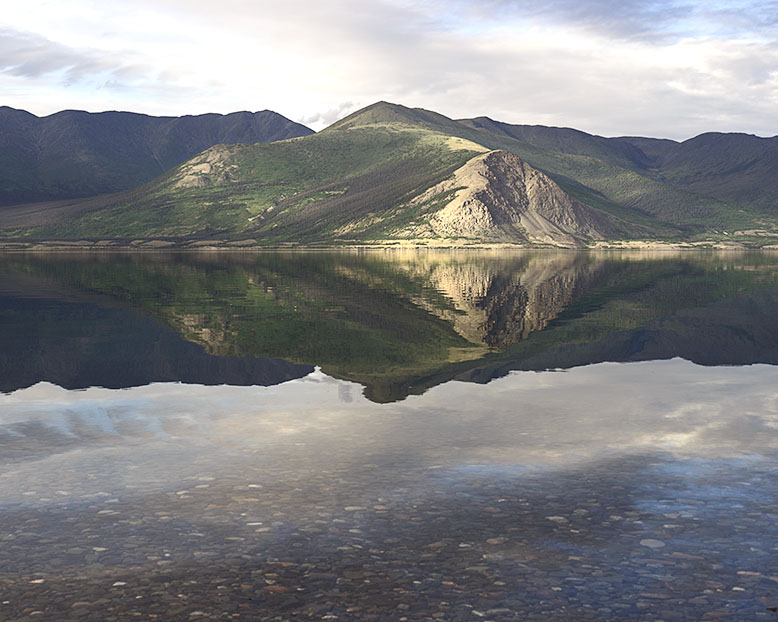
The framed print that we have on display is the 4:5 version of Kluane Lake and Ruby Range that I shot this summer while in the Yukon Territories. It was one of the prints that I submitted for jurying, and since it was ready to go, it was an easy choice.
Kluane Lake and Ruby Range – A framed 20×16 print now on display at the Wickenburg Art Center.
The Wickenburg Art Center gallery is at 188 S. Tegner Street. That’s two blocks south of US60. Tegner is the Wickenburg old main street and the light immediately west of the railroad underpass. If you’re in the area, stop in and enjoy the work local artisans have on display.
My next project is to get two prints ready for the Gold Rush Days Fine Arts Show in February. Those will be on display in the Wickenburg Library from February 10th through the 12th. I haven’t decided what to submit yet and perhaps you can help. I need to have the photos printed and framed by the beginning of the month and I think they should have a common theme. Should I submit two images from our trip? Maybe a couple of the local landscapes would be better; or how about a pair of old buildings as a submission? Which two of my images would you like to see hung on the wall? Let’s hear your comments.
After this week’s Newsletter/Post, there was still a lot of confusion about how to sign-up for automatic email notifications. It seems that the process was too convoluted and difficult to follow. I’m sure my directions didn’t help, mostly because what I see on my screen (as an admin) is different from yours.
New subscription button on the right —————————>
So with a little Web research, I was able to find a subscription widget and put it in the top of the right column. Now you won’t have to root around looking for boxes anymore. Simply type your email and click on the button. When you do, you will receive an (Oh my!) Email confirming your subscription.
Thanks for your patience while we all go through this learning experience.
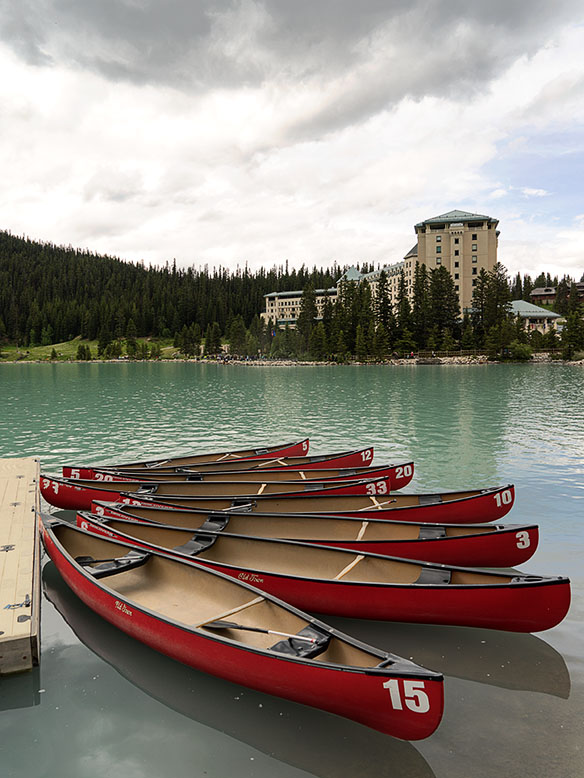
This morning I added another image to the New Work section of my Website. It’s called Rental Canoes at Lake Louise and I took this photograph in June this year while on our Alaska journey. I originally published the picture in the blog entry; Lake Louise – Alberta. This is the official edition as processed on my office set-up.
Red rental canoes tied up at Lake Louise’s dock. Since the day is rainy, there weren’t many takers.
This image is a cluster of red rental canoes tied up at the Lake Louise dock. It rained off and on during the day and only a few hearty souls ventured out onto the lake. In the background is the swanky Fairmont Chateau at Lake Louise. If you travel to Alberta Canada, Lake Louise is a must stop, and if you have the where-with-all to spring for a room and/or meal at the hotel, you won’t be disappointed; highly recommended.
Murphy’s Law strikes again (you really didn’t see that coming?), and as a result, my three frames turned into two. I’m generally pleased with how they came out, but as you would expect, there’s room for improvement. It’s that strive for perfection that keeps us going.
In the last post, I had concerns about getting the size right, because I already bought mats and glass cut to 28×20 inches. I could shave a little off of the mats, but not the glass. I wanted them to drop in the ¼ inch rabbet, but not be too sloppy. Figuring out the cut length of each side was straight forward. If you managed to stay awake in high school geometry, you’ll remember that the sides of a rectangle add up to 360°, so the four corners are 90°. The cut angle on the frame ends is half that, or 45°. The geometry teacher also went off on something called The Pythagorean Theorem, you know, the square of the long side of a right triangle is equal to the sum of the squares of the other two sides.
By now I’ve made Queen Anne’s eyes roll into the back of their sockets. Don’t worry, you don’t need to know any of that, nor do you need your calculator with a square root key. Just remember that 45° is the magic number where both short sides of the triangle are equal. Since the width of my frames from the rabbet to the outside edge is exactly ½ inch, I need to add ½ inch to the length . . . at both ends. In my design, the frames outside dimensions are 29×21 inches. Since I wanted them to fit loose, I added another 1/32 inch.
Now that I had all the calculations out-of-the-way it was time to cut some wood. The first thing it did was to set my saw’s miter gauge to . . . 55°, and made two 29 inch cuts. Then I laid them out on the table, and like a dork, I tried for fifteen minutes to figure out why they weren’t square.
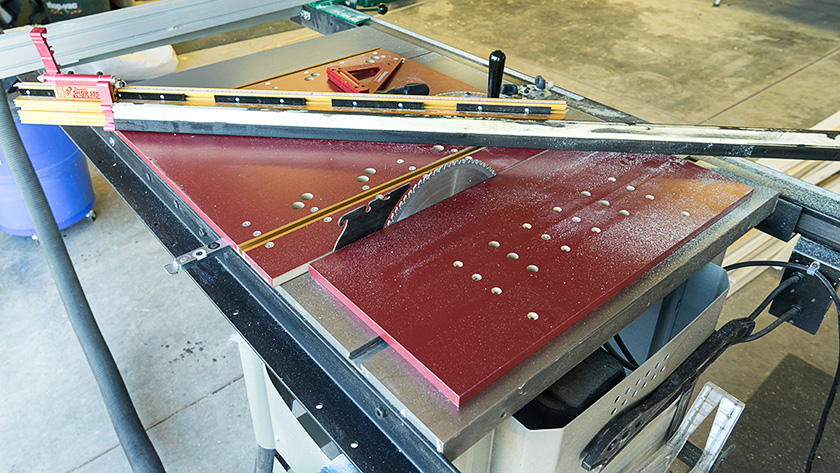
After I discovered my mistake, I thought that I could salvage the two cuts by cutting them again for the short side. About my Incra miter gauge; . . . it’s very precise with stops that can be set to 1/10°. I’ve added a Incra fence to it that helps me make repetitive cuts, but it’s kind of thick and its measuring tape pivots in front of the miter gauge, so it needs resetting each time the angle changes. It’s simple enough to do; I just set the stop to 10 inches, cut a piece of scrap wood, measure the actual cut length, and then adjust the tape to match.
With the Incra miter gauge and fence, it’s easy to make accurate repetitive cuts. The trick is getting the set up right in the first place.
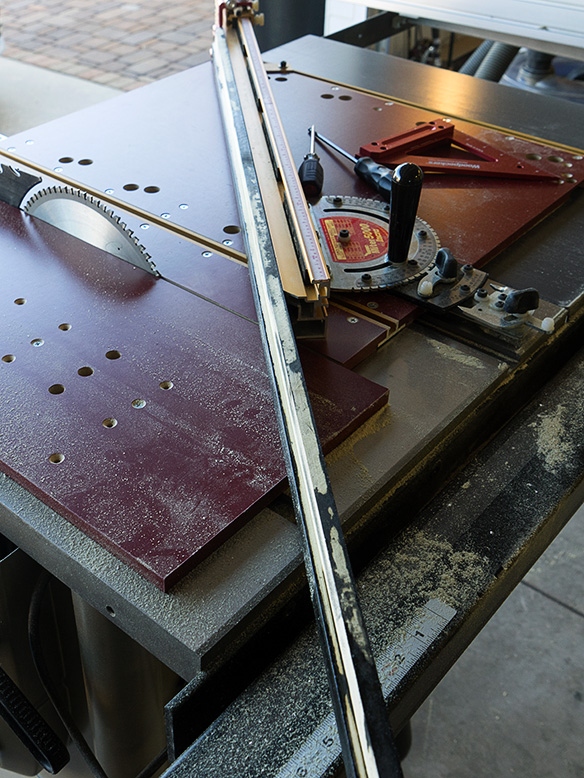
Now, I’m already recovering from one mistake and I’m mentally beating myself up, so I’m not thinking about if I change one thing, how it affects another, and I’m rushing. I set the miter gauge to 45° and double checked it and made sure all the fine adjustments were set to zero. I set the stop to 10 inches, grabbed a piece of scrap off the rack and began my test cut. As the blade goes through the wood, I notice that my brand new Tenryu carbide blade is also cutting off the corner of my Incra aluminum fence. At 55° the fence cleared the blade, it didn’t at 45°. Fortunately, the blade went cleanly through the aluminum without exploding, but I’m sure it took a beating in the process.
Notice the 45 degree angle cut on the gold fence. It wasn’t there a minute ago. Fortunately, the carbide tipped blade took the cut in stride.
I had to take a moment and step back for a breath and a few well placed words normally spelled with symbol keys. When gathered, I adjusted the fence to clear the saw blade, and cut another piece of scrap. After correcting the tape, I was ready to shorten my first two pieces. I ran the piece through the saw and realized that I held it against the fence backwards. Now it was too short.
Believe it or not, I actually did wind up cutting the rest of the pieces correctly. Once I had everything set it was easy. I just had to focus. And with the fence stop, I could take a cut off a longer piece, by cutting the first miter, flip it over and cut the other side. They came out perfect. As I said, I wound up with enough for two frames and some pieces I can eventually use for smaller frames.
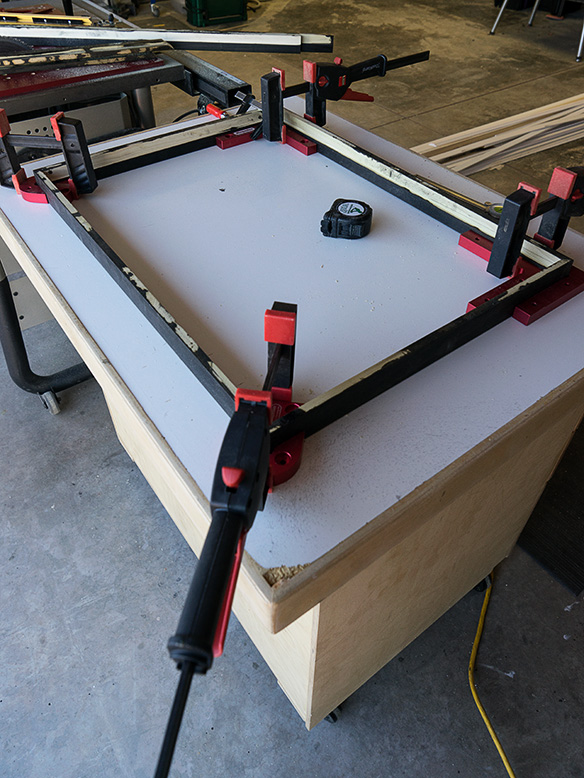
The jigs that I have let me glue up two corners of the frame at a time while the other corners are held in place with right angle aluminum corners. A better solution would be a clamp that added lateral pressure while holding the miter in place.
The next step was to glue the four sides together. I have some aluminum jigs to hold the corners together at right angles. They work really well except they don’t exert any lateral pressure to the joints. The glue has to set up without pressure. End grain joints are not very strong, so I planned on making a spline joint after they dried. That would be strong enough to hold the glass.
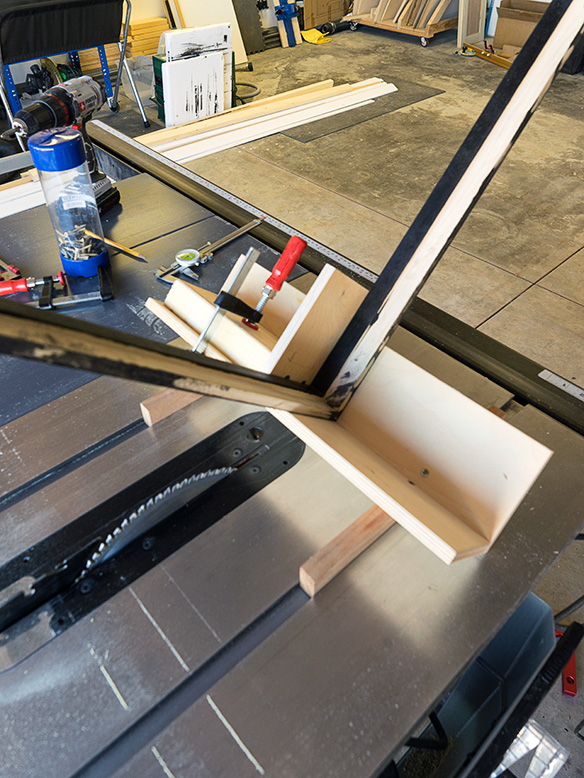
This jig was the first that I made a couple of years ago. I didn’t expect that it would take this long to use. It holds the frame upside down so a slot is cut into each corner.
After getting a table saw a couple of years ago, the first jig I made was one for cutting spline slots in frames. It’s simply two pieces of plywood attached to a couple of mesquite runners. It holds a frame (or box) at an angle so you can run it through a saw. Then you cut wood in 1/8th inch slices and glue them into the open slot. After they dry, you trim off the excess, sand and finish. Since this was the first time I used it, I set the depth of the saw blade too deep. It needs to be less than the thickness of the wood piece you’re slicing. I was using standard one by (4×4), so I shouldn’t go any deeper than 5/8 inch into the frame.
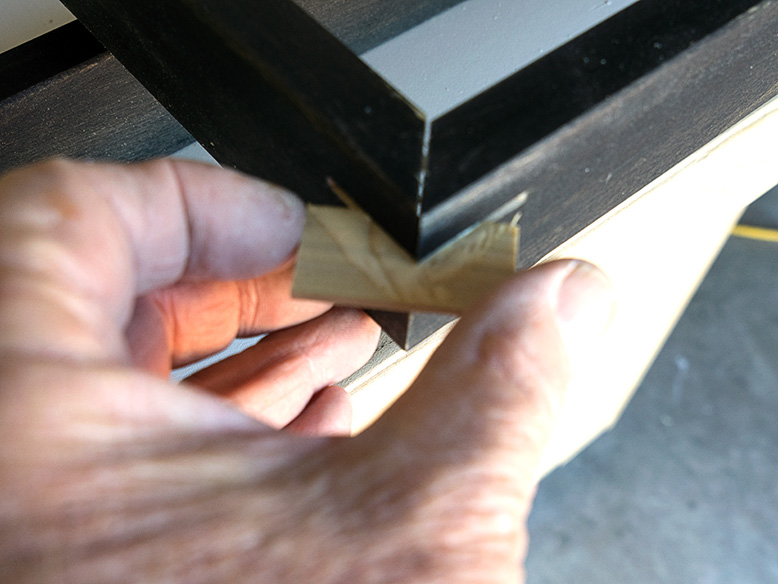
A piece of wood, cut to the thickness of the slot, is glued in the corner to reinforce the joint. After it dries, the excess then trimmed and sanded flush.
Finally there’s the finishing fiasco. I wanted to have my frames ready for the Museum Show last week, so I used materials on hand. I wanted a black stain with a clear top coat. The local hardware only had oil based stains on hand and I use normally use a water based finish coat, so mixing the two isn’t possible. I decided I could spray some shellac and lacquer for the last finish and bought a couple of cans of both. When I put a coat of shellac over the black stain as a sanding sealer, it looked good . . . until I started sanding it. The sandpaper took off the shellac and most of the black stain. It looked retched.
I didn’t have water-borne black stain, but I did have a very dark brown. I mixed it with the acrylic sanding sealer in a one to one mix and brushed it on the frames. After it dried, I tried sanding it, and even that quickly got down to the base wood. The stain hadn’t penetrated the poplar enough to keep the color during sanding. As a last resort, I applied two coats of the colored sanding sealer letting the frames dry after each coat.
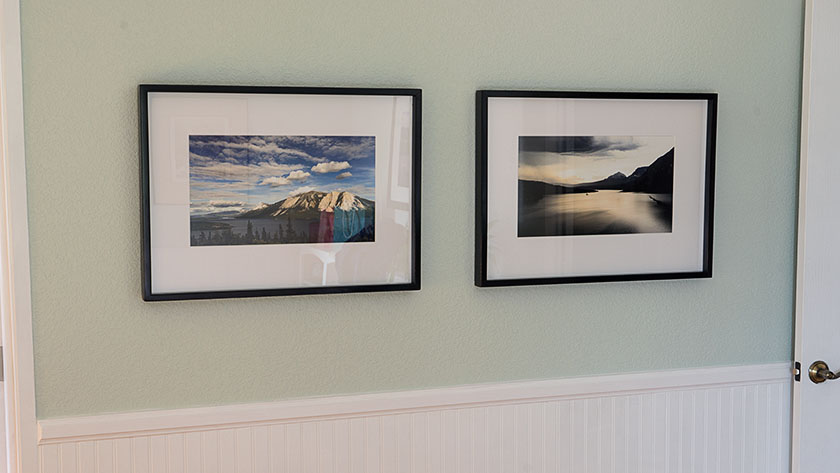
On close inspection, they look awful, but are good enough at a distance. Fortunately they weren’t lit up with a hot spotlight at the show, so they looked good in the dark. After the show, we hung the framed prints in the bedroom where they look just fine.
Well, . . . they’re finished until I get the process under control and make better ones. I wouldn’t sell this pair, but as prototypes, they do what I wanted . . . raise the print away from the wall and simply set off the image.
I’m going to try another type of wood on my next frames. I’m thinking about birch or alder. They’re in the price range of poplar and neither of the former has the green streaks of the latter. I’m leaning towards the birch, because I understand it’s easier to work with than the maple I’ve worked with in the past.
Here’s a final list of numbers from Fritz’s trip meter.
12,079 total miles driven
329.21 total hours the motor was running
37 mph – the average road speed
18.3 mpg – Fritz’s average miles per gallon for the trip
To put that in perspective, twelve thousand miles is just short of half way around the world. It’s about a third more that the 9,000 on Fred’s itinerary, but he based his number on point to point distances. We made a lot of side trips. My original budget proposal was only 7,000, based on a Google Maps trip to Fairbanks and back.
Yesterday’s drive went just as I imagined it. We left Bakersfield at 7:30 and stopped in Tehachapi for gas and coffee. We hit the I-40 Bridge over the Colorado River at 12:15, and then stopped for lunch in Kingman at 1:00. That’s how I called it in my earlier post.
We got to Kingman at 1:00, just as I thought we would.
We had a leisurely afternoon drive down US-93 and were home by 4:00. I wanted to brag that we made the trip without hitting a moose (there are none to hit), and that I came home without a cracked windshield. I also wanted to say we drove half way around the world without incident, but I can’t, because as we say around here, I just made the newsletter.
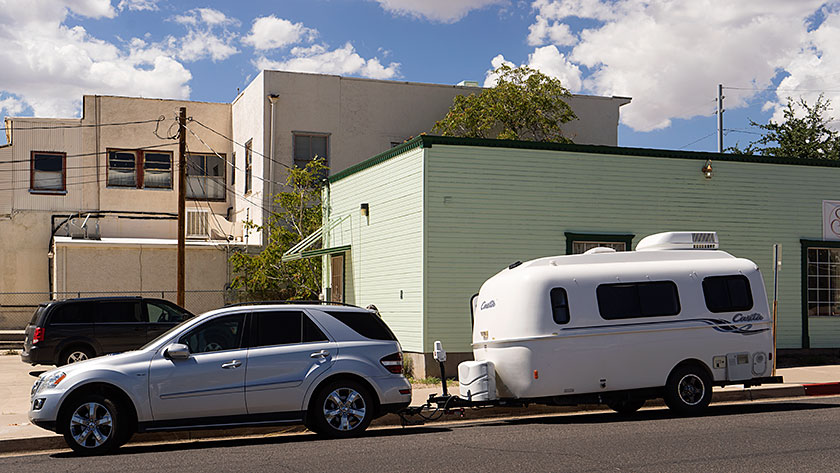
When we pulled up in front of the house, our neighbors, John and Reenie greeted us with waves from their front porch. Then I started to back The Ritz into the drive and around the house and deck. That’s a big u-turn pushing the trailer backwards. I did it on the first try, but it wasn’t lined up perfect, so I pulled forward to straighten it out . . . and ran over the plastic stanchion that holds the water and electricity for one of our hook-ups. Instantly we had a nice little fountain in the back yard.
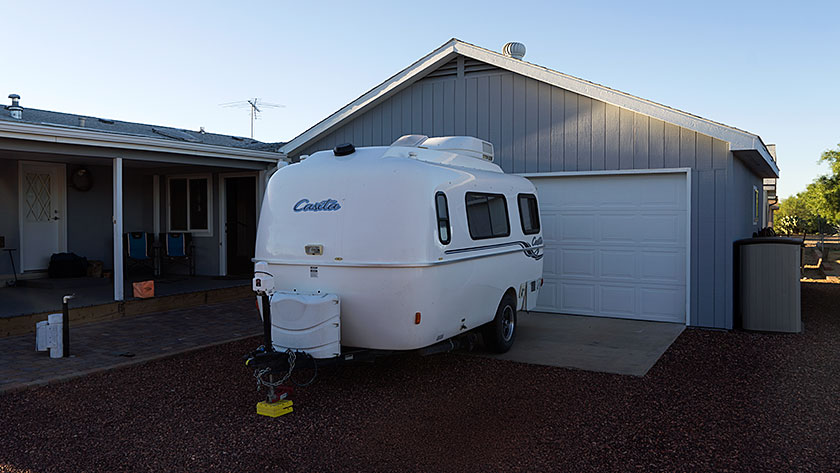
All we wanted to do was to park the trailer in a place to unload easily. To get it there, we had to back it around the house in a U-turn.
John went across the street and retrieved a water-valve shut-off wrench and we turned off the main. Since the temperature was near the century mark, we unloaded all the wine into the cooling house. Then I unhooked the trailer and made a mad rush to the hardware store to get a cap and some PVC glue, so that we could at least turn the water back on.
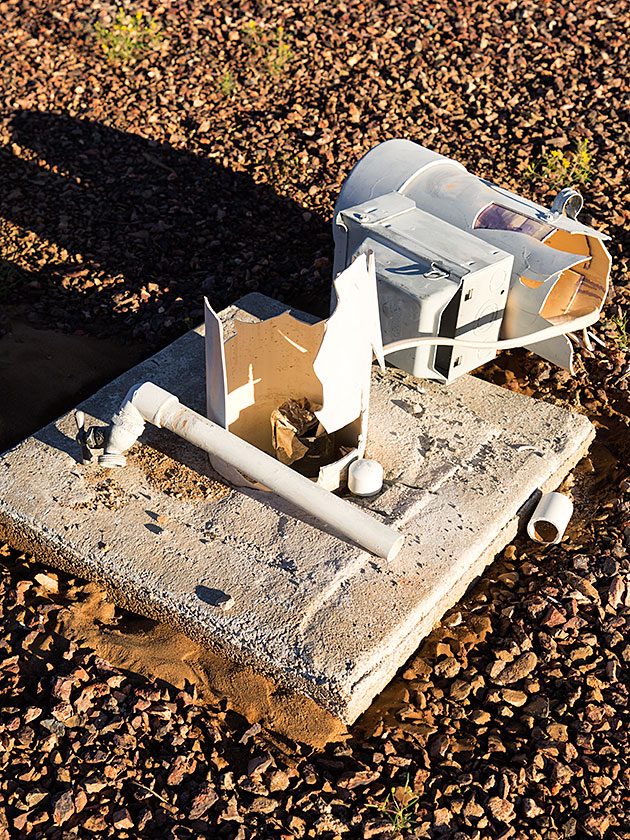
The stanchion holding the water line and electrical outlet, lays shattered on the ground.
I made it before they closed and after getting home, I cleaned up the broken pipe and glued the cap on. Satisfied that the repair was good, we then turned the water back on, only to find that I broke the PVC pipe under the concrete base. The whole thing needs torn up and replaced. So we’re waiting for the plumber to come this morning.
In the mean time, we’re living with water buckets from the John’s spigot, and bottles of drinking water we had stored in the freezer. It’s a challenge for sure, but it’s good to be home.
On another note, you’re probably interested to find out about the rest of the gang. You may remember that Fed, Deb and Sally wanted to spend more time in Canada. About ten days after we did, they crossed the border (without inspections). Then they recreated Patton’s March down the east side of the Cascades and Nevada and got home a couple of hours ahead of us.
So I guess this means, this chapter in our lives has come to a close. I have a newsletter to write sometime this weekend. If you’re a subscriber, I apologize. I guess I’ll do a follow-up of the trip. But this will be the last post about our trip to Denali. I’ve had fun writing these for you, but I’ve run out of topic and I don’t know what else to talk about.
What do you think? Have you had enough of us, or is there another subject to cover? I’d like to hear from you.